Showing posts with label linux. Show all posts

May 4, 2017

Recovering from Black Screens in Linux

Windows gives you BSOD ( Blue Screen of Death)

It seems Linux gives you Black Screens. It is not crashing, but sometimes, you end up landing in such a state that all you get is a black screen and there is not much you can do about it.

Recently I got into such a situation. This is related to the NVIDIA drivers for Linux, but maybe you got it for some other situation.

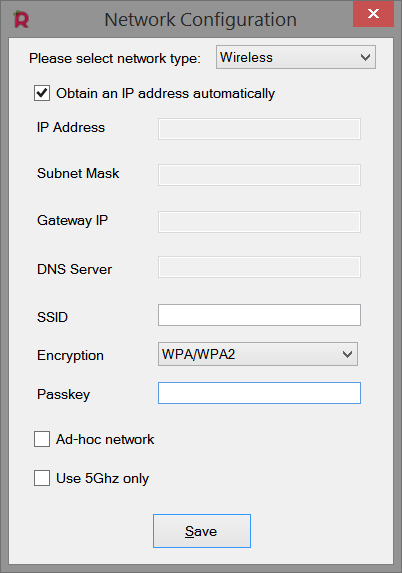
In my case, I was fiddling around with the graphics card setting. The MIS GL62 laptop has lousy battery life - hardly lasts 2 hours. So, I was trying to figure out how to reduce the battery drain when not doing something graphics intensive. There is a mode in Nvidia called Prime which allows you to switch between Nvidia and Intel graphics, and I changed that to Intel - and viola ... the problem. 

The problem:
The problem is that sometimes the graphics drivers mess up badly that there is no display. The ctrl+tab+1 trick does not work - you do not end up getting the terminal to fix it.

So, what can you do in this case ? There is not fallback ! Or is there.

This requires a bit of jugglery. I will list out what I did in my case - you may need to do something different in Step 3.

Step 1: Get the boot menu 

Now, my laptop has only Linux in it. So, unlike my deskstop where I dual-boot I do not get a grub prompt for choosing which OS I want to boot into. As such , it just directly starts the Linux boot process and hangs up.

So, to get the Boot menu, you need to press the ESC key or Shift . I do not know exactly which ones, so I mashed both the keys.


Step 2: Get into recovery root shell.

Now, that you have the menu, use the down arrow to get to recovery option. Click that and you get another set of actions - go to the root .


Step 3: Fix the problem ( or make an attempt at it) 

Ok. Easier said than done. I tried a variety of stuff but ultimately I had to remove the Nvidia driver to get the X server to work. You need to remove all settings for which you use the purge option for apt ( debian systems ) to remove the driver. e.g. In my case:

sudo apt-get purge nvidia*

Now, reboot and the X server will pick up the default configuration, using the inbuilt drivers which support the Intel graphics chipset and boot you into the windows manager.

Once you can boot in, you can now reinstall the graphics drivers and continue your work.

Phew ! 

Feb 10, 2017

[Linux] Printer is Paused

Today got a weird problem with my HP printer. It would say that the Printer is paused.

After searching a bit found out that this is because the printer driver (cups) gets paused due to any printer error. In my case it was due to the paper jam.

The solution is quite simple.

1. Go to http://localhost:631/

This will open the cups maintenance page. If a password is asked, give your login password which has root rights.


2. Click on printers tab.  You will see your printer listed and in paused state.

 3. Click on the printer and go to the dropdown for 'Maintenance' and click on 'resume'.


4. You will see the following kind of screen and when you click on printer again, you will see that status has changed from 'paused' to 'idle'.


Mar 31, 2016

Linux in Windows 10

In my brief stint in Microsoft, I worked on a project that was called Services For Linux. It was a project to get the posix commands working on the command line.

I was pretty excited as I had been a long time user of Linux already, and thought it was quite rad to have this thing in linux iteself. I had already been using cygwin shells before in other companies. However, the excitement turned sour quite early on due to the attitude within the company. If there was a bug, it was mostly marked as 'as per design', and any argument that this is not how it works on linux was met with 'We are Microsoft. We do it our way'.

So, I am quite surprised and excited to see that Microsoft partnered with Canonical to get this in Windows10. So, far the demo seems to show it as an actual full fledged bash shell, instead of the lame implementation the SFU team was working on.


As usual, expect quite a big backlash from the online Linux community towards Canonical.


More details at : http://www.pcworld.com/article/3049664/windows/hell-freezes-over-microsoft-partners-with-ubuntu-to-bring-bash-shell-to-windows-10.html

Mar 20, 2014

Setting up Rasberry Pi as a Media Center


Recently got hold of a Raspberry PI as I had heard a lot about this thing. The main thing I wanted to do was set it up as a media center. Now, though a lot of information is there on the net about how to do it, there was sadly a lot of information which was missing. The main aim of this blog post is to help you to get a whole setup running - because getting just the Raspberry Pi will not really work out of the box. The Pi team also assumes that you will have a lot of these things already at home - and while that is mostly correct, it does not really help in a permanent setup.

Parts List

Here are the parts you will need. Basic Assumption - you have a TV with HDMI , and you have access to a laptop/PC and access to the internet. Also you have the media on a USB drive.

This is not mentioned in any one place, and it took me a while to figure out :

  1. The Raspberry Pi : I suggest getting the one which comes with a box cover, as here in India it is quite dusty. Also, get the Model B as it has more RAM, and extra connection ports. 
  2. A HDMI Cable : The Raspberry Pi connects to video via a HDMI port, and although your TV will already have a HDMI cable, you would already be using it. So, order a separate cable to use with the Pi else you will keep swapping the cable between the pi and the other box you use ( in my case the TV reciever box)
  3. A WiFi USB dongle : I suppose there will be a day when the pi will have the wifi inbuilt into the box. But so far, it comes only with an Ethernet connectivity. Since you will normally not have an ethernet cable running all the way into your living room, you will need the WiFi connectivity. Not all USB Wifi Dongles work ! Make sure what you purchase is supported - check the list
  4. A SD Card : The PI does not come with any hard drive. It uses SD cards for booting up. If you have a digital camera ( except the SONY ones), then you will already have a SD Card. You will minimally need a 4GB card - but I would suggest something bigger.
  5. A power source : The PI uses the same power adapter as most phones ( unless you have an iPhone). It is a micro-usb powered devices, so most android phone chargers would fit. What you want is something which can give 5V and 1.2 A . The google Nexus phone charger fits the bill perfectly. Technically, you can have a lower A ( 750 mA is the least power you need), but to power the USB ports, I would say go for something with 1.2A or else get a powered USB hub ( next point)
  6. A powered USB hub. Mostly the USB hubs we have are not powered. They derive the power from the PCs or laptops. But with the low power that the PI uses, if you want to get anything attached to the PI, get this. With the 1.2A adapter I have seen you can power a HDD and a wifi dongle. But nothing more. 
  7. A Keyboard and Mouse : Well, actually the mouse is optional, as you can do most things using the keyboard. Also keyboard will be required just at the start if really needed, else most of the TVs with a CEC remote - you can control the media center through the remote. 
  8. A SD Card reader. The way you will install the OS on the SD card is via a card reader. If you have a laptop with the built in slot - great - you can use that. Else you will need a card reader. 

Cost

Here are some links to get you started off on your purchase : 
  1. Raspberry Pi with clear case at Crazy Pi : Rs 3,490
  2. HDMI cables from Amazon : Rs 399
  3. COMCAST WiFi USB from Amazon : Rs 399
  4. 8 GB SD Card from Amazon : Rs 467
  5. Powered USB hub from Crazy Pi : Rs 750
So, that comes around 5,5k + taxes ( Amazon has taxes included in the price, but Crazy pi has additional tax and shipping fee).

Setting up the SD Card


Now that you have all the hardware, the next step is to install the OS on the SD Card. Head over to raspbian and download the installer. This is a small installer which will be used to install the entire system. 

XBIAN is a media center which is linux based.
RaspBian is an XBIAN build specifically for the Raspberry Pi
Next, connect the SD card to your laptop/PC. Follow the steps given on the installation page. In addition make sure click on the "Manually configure WiFi" which will popup a screen to enter the details of your WiFi Setup. 


Enter the details and let it finish writing to the SD card. 

Starting the Media Center

Now, assemble your PI by putting in the SD card, the WiFi dongle and connecting to the HDMI cable and the USB drive. Plug in the power source only after you have connected everything else. 

As soon as the power is connected this will boot up and you will see onscreen details scroll by. If the WiFi has been setup correctly, you will see the update starting. Wait for it to finish ( it is about 1GB! )

After that you will be in the Xbian interface and can start watching your media!

Aug 14, 2012

Ubuntu no sound fix for USB audio

Update 14/08/2012 - please see Edit2 below for a solution. 

Ubuntu 11.10 seems to be quite a step back in terms of usability. Things which worked in 10 are broken now. One of the things that was driving me crazy was the audio was not working sometimes.

My system uses a USB audio system (Bose Companion 5). I believe this issue is there on other systems using USB audio also.

When I used to boot, the system would come up but there was no audio. The audio would start once I would slide the volume slider down and up. But if I start VLC video player, the sound would go away all together and the only way it would work was to reboot the system. This was nuts.

After a lot of searching, i finally got the solution from Ubuntu Forums . Here's the relevant part of the solution.It involves un-installing and re-installing the audio systems.

Open a terminal and enter the following:
sudo apt-get remove --purge alsa-base
sudo apt-get remove --purge pulseaudio
sudo apt-get clean && sudo apt-get autoremove
sudo apt-get install alsa-base
sudo apt-get install pulseaudio


For some reason while removing alsa-base it removes the ubuntu-desktop. So you need to install it again.
sudo apt-get install ubuntu-desktop

Now reboot your system. Once it comes up you will see that the audio icon on the top bar is no longer there. But now all sound should be working without fiddling around.

Drop me a comment if you had this problem and this change worked for you.

Edit: Seems there is still some reboot issue as pointed out by Albin in the comments below. Once you reboot - you will need to go to Settings -> Sound and slide the volume indicator up and down to get the sound. :(

Edit 2 : 14/Aug/2012

I entered a bug for this as I got frustrated. And then after googling extensively I finally got a solution of setting usb audio as primary sound device and it seems to work.

Essentially you need to do the following steps :


1. Edit the file /etc/modprobe.d/alsa-base.conf . Since this is a system file you will need to sudo to get this done. e.g. 
$sudo vim /etc/modprobe.d/alsa-base.conf
2. Scroll down to the end. Now you have to change the line which says 
options snd-usb-audio index=-2
to 
options snd-usb-audio index=-1
Reboot and it should work. 

Mar 30, 2010

Network not working after upgrading Ubuntu

So, I upgraded to 10.04 beta, and the network stopped working. Ping to local machines based on IP was working, but pining google resulted in host not found. Firefox was also not working...

After much R&D finally figured out that the problem was with the DNS resolver - which got overwritten during the upgrade somehow. The quick hack is to just edit the file and enter the DNS name servers. Here's the output :
vibhu@zion:~$ cat /etc/resolv.conf
# Dynamic resolv.conf(5) file for glibc resolver(3) generated by resolvconf(8)
# DO NOT EDIT THIS FILE BY HAND -- YOUR CHANGES WILL BE OVERWRITTEN
nameserver xx.xx.xx.xx
Put the IP addresses of your name servers instead of the xx's

The puzzle which still exists is why the DNS is not put in automatically. Still looking at that

Aug 2, 2009

Cost of a Mac

So, someone was telling me the other day that if one wants to get a laptop of the same spec as a Mac, it would cost more.

Is that true ? I decided to check it out.

I decided to check it against the Alienware laptops from Dell. ( Alienware used to be a different company, but Dell aquired it a few years back. I guess they thought they would benifit from the reach of Dell).

Here I am not going to go on about the OS part of it. Just the hardware part. OS is a personal choice. If you like to let the OS do everything - its a Mac for you. If you want to configure everything - go and get Linux. If you want something in between - try Windows. Whatever.

This is a comparison purely for gaming rigs. I am looking at the cost vs specs of a high end gaming rig.

Macbook Pro Alienware (custom rig)
Cost : $2499 $2074
Screen : 17" 17"
Memory : 4 GB 4GB
Hard Disk : 500 GB 5400rpm500GB 7200rpm
Processor : 2.8 GH Intel Core 2 Duo 2.8GHz Intel Core 2 Duo T9600
Keyboard : BacklitBacklit
OS : Mac OS X Windows Vista Home Premium 64
Colour : White Black
Graphics : 9600M GT (512MB) GTX250M (1GB)
Weight : 2.99kg not specified
Battery Life : 7 hrs not specified
Screen Size : 1920x1200 1440x900

Matching the specs of the apple , the Alienware rig comes out to be less costly !

May 13, 2009

Howto install Bugzilla on Ubuntu 11.04

Update : 1st may 2011 : Updated the installation for Ubuntu 11.04 and Bugzilla 4.0

I was trying out bugzilla installation on Ubuntu. Although there is a bugzilla3 package I never was able to properly configure it. Today, decided to look at this issue again and googled for any HOWTOs. I got this sweet piece of setup at : Handyowner . There are some formatting issues which made me struggle a bit - so here is the reformated installation guide.

Assumptions:
Ubuntu is already installed and configured on your target machine.
The machine is connected to the Internet you can browse the World Wide Web.
Here are the main steps:
  1. Install Per l(5.8.1 or above)
  2. Install MySQL
  3. Install Apache2
  4. Install Bugzilla 3.2
  5. Install Perl modules
  6. Bugzilla using apache
1. Perl
Verify if Perl is installed:

$ perl -v
If not installed :

$ sudo apt-get install perl
2. MySQL
Verify if MySQL is installed:

$ mysql --version
If not installed :

$ sudo apt-get install mysql-client mysql-server mysql-admin
Create “bugzilla” user with a strong password:
$ sudo useradd -d /home/bugzilla -m bugzilla
$ sudo passwd bugzilla
Tip! Here is what makes a password strong: make it lengthy, combine letters, numbers and symbols, use words and phrases that are easy for you to remember, but difficult for others to guess.
Create a database ‘bugzilla’ and grant privileges to ‘bugzilla’ database to ‘bugzilla’ user:

Tip! I usually set the bugzilla user password through the mysql admin interface ( Application -> Programming -> MySql Adminstrator).
$ mysql -u root -p
mysql> create database bugzilla;
mysql> show databases;
+--------------------+
| Database |
+--------------------+
| information_schema |
| bugzilla |
+--------------------+

2 rows in set (0.00 sec)
mysql> grant all privileges on bugzilla.* to bugzilla@localhost;
3. Apache2
Verify if Apache is installed:

$ apache2 -v
You can also view in a web browser the default welcome page at http://localhost
If not installed :

$ sudo apt-get install apache2
4. Bugzilla 3.2.2
Download Bugzilla from the site “ http://www.bugzilla.org/”.
Tip! Download a stable release, unless (1) you would like to go bleeding edge, (2) you do not care about spending time with your girlfriend, your wife, your kids or your buddies, (3) your boss said so and you couldn’t say no.
Untar the downloaded file to your download folder

$sudo tar -xvf bugzilla-3.2.2.tar
Move bugzilla dirrectory to /usr/local/

$ sudo mv /download/bugzilla-3.2.2 /usr/local/
Make a symbolic link from /usr/local/bugzilla3.x to /var/www/bugzilla

$ sudo ln -s /usr/local/bugzilla3.x /var/www/bugzilla
5. Perl Modules
Bugzilla’s installation process is based on a script called checksetup.pl. The first thing it checks is whether you have appropriate versions of all the required Perl modules. The aim of this section is to pass this check.

Verify if Perl modules are installed

$:/usr/local/bugzilla-3.2.2$ sudo ./checksetup.pl --check-modules
If not installed:

$:/usr/local/bugzilla-3.2.2$ sudo perl -MCPAN -e install
Edit the ‘localconfig’ file

$:/usr/local/bugzilla-3.2.2$ sudo gedit localconfig

Change the $db_name, $db_pass and $db_user value to the correct values. Here's how it looks like in my localconfig (replace the password with your actual password, this is just a placeholder here)

# The name of the database
$db_name = 'bugzilla';

# Who we connect to the database as.
$db_user = 'bugzilla';

# Enter your database password here.
$db_pass = 'bugzilla@123';


Run the checksetup.pl again. This will add a whole lot of tables for bugzilla, and you can verify that by looking at the tables in the 'bugzilla' database.

$:/usr/local/bugzilla-3.2.2$ sudo ./checksetup.pl
6. Configure Apache2 for Bugzilla
Add the following directives to /etc/apache2/apache2.conf
$sudo gedit /etc/apache2/apache2.conf


*Note : Since the brackets give problem with blogger, added pic for the relevant code changes. All the non commented lines are what you have to type in.


7. Additional security
create user “apache2″

$ sudo useradd -d /home/apache2 -m apache2
$ sudo passwd apache2
Edit /etc/apache2/envvars to add. This is how my config looks
export APACHE_RUN_USER=apache2
export APACHE_RUN_GROUP=apache2
Note : The default user and group is www-data. I don't really know how to setup the export to use both the www-data and the apache2 user simultaneously. If anyone can help with the syntax, it will be great ! 

Edit /usr/local/bugzilla-3.2.2/localconfig to add

$webservergroup = ‘apache2′;
Rerun checksetup.pl

$:/usr/local/bugzilla-3.2.2$ sudo ./checksetup.pl
This will ask you to setup your administrator for bugzilla. Go ahead and enter the password and email ids.


8. Check the Installation
Restart the apache server using the command

$ sudo /etc/init.d/apache2 restart

Type the in your browser http://localhost/bugzilla/ . You should be getting the bugzilla login page. Login using the email and password you did at end of pt 7.

Jul 4, 2008

Screen Resolution problems on Ubuntu ?

Did you just do an upgrade in Ubuntu, and are now stuck with a 640x480 resolution ?

This seems like a common problem on machines with Nvidia based graphics cards. There are various solutions given on the net, but the one that works for me ... remove the Xorg.conf file.

Heres how you do it.
1. Start up your linux.
2. press the keys together : ctrl+alt+F1 . This will bring you to the command prompt.
3. Login with your username which has admin privilidges.
4. mv the Xorg.conf file to something . E.g. I used the following :
sudo mv /etc/X11/Xorg.conf /etc/X11/Xorg.bk
5. go back to the UI screen by pressing ctrl+alt+F7 .
6. press ctrl+alt+backspace to restart the X server.

presto , it will recreate the Xorg.conf file and you should be back to optimal resolution now.

If you run into issues, you can go back to the F1 screen, and mv the backup back to the original filename. And try your luck on google.

Jul 3, 2008

BSNL broadband on Linux

I did not realize it would be so easy.

The broadband got connected when i was in office. So, I was not able to check out what the guy did to get it to work on windows. Did he do it through a CD or what ? What was the settings that he used ? How will I get it working on linux ? None of these queries answered.

Googled a bit on it. Found that it is a PPPOE modem connection. There are a few howtos in it , which talk about configuring the interface and modifying the routing tables manually. Scary stuff. Then they mention as an alternative the pppoeconf ...

hmmm.

so all you need to do is run the following command on a terminal window :
sudo pppoeconf
and add the username and password when prompted, and just do 'ok' for everything else.

Apr 26, 2008

Ubuntu 8.04 : Hardy Heron

The hardy heron welcomes you !

Installation

8.04 of Ubuntu OS just got released. This is a linux based OS, and I am a big fan of linux. Probably because its a bit geeky, and i like it. However, with the latest release of this OS , it seems to be almost ready for primetime.

Here, I will take you through the post installation process for setting up the system with Ubuntu so that it can do most of what I demand as a user. I will try to cover the programatic settings in a later post.

Ubuntu comes in a single disk installer. This is good as you only have to get 1 disk, or download 700MB if you want to get the disk by download. The downside is that not all the programs are there. However, even with the single disk, you will get more than what you would get by just installing Windows XP.

Apart from the OS, you get the following goodies bundled in:
1. Firefox 3 Beta web browser. ( I am using this to type this post)
2. Openoffice . This is just like Microsoft Office with similar capabilities. Its a complete suite with word, excel and ppt programs
3. Evolution. This is an email software very similar to Outlook.
4. Music player (rhythmbox)
5. Instant Messenger (Pidgin)
6. CD/DVD burner
7. CD Extractor for ripping your CDs into different formats.
8. Gimp . An image manipulation software which i also used for a couple of edits to the images here.


Running OpenOffice and showing the time applet

The above screenshot (you take a screenshot by pressing Print Srceen on the keyboard). The cool thing that got added is the enhancement to the time applet. Now, i dont have to worry about calculating the time in different timezones. The top right drop down shows the date, the calendar (which actually integrates with the Evolution's calendar) and the multiple time zones. I have added Delhi and London for example. Your home location is shown with a home icon ... cute !

Most customizations require you to have a working internet broadband connection.

Music

Music has been the irritating thorn for linux systems - especially mp3 file formats - due to patent issues. So, you cannot play mp3 files unless you download the decoder for it. Due to the patent issues, they dont come with the install, and you need to install from the interent. Ubuntu makes this quite easy.

Here's what happens. When you click on the mp3 file (in this case its a rip from my CD of linkin park), it asks you whether you want to search for the decoder - and does it for you. Warnings are shown to let you know the issues you may face.

I find this mp3 farace quite irritating. Most of my collection is now in ogg-vorbis format, so that i dont face this issue. However, since most people will be having mp3 , I thougt this may help them setting it up.
Do you want to play mp3?


Graphics Card

By default, the graphics drivers with ubuntu are not great. However, nowdays companies like Nvidia and ATI provide proprietry graphics card drivers. This is a must for me ! I love playing games ! So, once the computer has started playing songs full blast at 2am, i switch to getting the graphics card working.

This is quite easy. All you need to do is start a program by going to :
System->Administration->Hardware Driver

This will list the hardware which has proproetry drivers, as shown below.

Tick the box next to the driver you want to enable. A few mins later the correct driver has been downloaded and installed ! Eureka !

Now you can check out all the bells and wistles of the desktop effects (like wobbly windows), by enabling the effects. However, i usually turn them off, as I find them irritating after some time.

Dual Monitor

Ok. this step is for those who want to use 2 monitors with linux. Its a bit tougher than the first few steps as you need to type a few letters in.

Open the Terminal window (this is like the DOS command on windows , but you can do almost anything from here), and type the following :
sudo apt-get install nvidia-settings
This will install the nvidia settings. Now you need to configure the display. Type the following command in the terminal :
sudo nvidia-settings
This will open the following window. Make the necessary changes.

Enabling dual windows


Running Windows Programs

Sometime you would want to run windows programs. E.g. I want to play the World of Warcraft on linux. But the game comes in windows format - so how do i play it ?

The answer is the Windows Emulator program , known as wine. Installation is simple. In the terminal window, type the following command :
sudo apt-get install wine

This will install wine, and it will also show up in the Applications menu. Now running applications is as easy as double clicking it.


IM

Most people cant stay without chatting nineteen to the dozen on the internet. Though most popular instant messengers do have a web based chat interface, nothing beats the locally run programs like gtalk or ymessenger. However, on linux, these providers dont provide their programs - as there is something already present with which you can chat using any protocol. This is known as Pidgin !

Here , i am configuring pidgin to run my chat of google talk and msn. Pretty neat eh ?
Setting up msn and google talk


Email
The last thing on the agenda which will make you start using Ubuntu for all your correspondence is Evolution - an email client.

Now, you can always use the web interfaces like gmail or yahoo for your email - and I would recommend you to do that, but sometimes you have another email account which is not so user friendly. If they provide any access mechanisms, then you can easily set it up with Evolution.
Popping messages from email
Here , I have setup my employees.org email address to work with evolution. No longer logging into their servers. Also, with the threaded message view, its easy to see the conversations.

Another thing which may be of interest to you is the display of hindi characters as in the screenshot below. No, i did nothing to install the hindi fonts, they came inbuilt !

Threaded view in Evolution

Some pros and cons which you may want to know :

Pros :
  • No viruses. Yup - you got that right. no longer you have to worry about viruses wiping your disk, or the virun scanner getting outdated.
  • OpenOffice default
  • Updates frequently depending on your net connection. Newer versions are installed free of cost and automatically.
Cons:
  • Still a bit geeky
  • MP3 support is not out of the box
  • You need a broadband internet connection to get things working properly.
So, now that you are all set, what are you waiting for ? Get the latest Ubuntu OS and install it !

Mar 6, 2008

Brainstorm Ubuntu


Are you one of those linux guys/gals ? I am anyways , so blogging about it :D

Ubuntu is one of the slickest linux distributions out there. I used to be a Red Hat fan, but now moving over to using ubuntu. These folks have started a new site for inviting recommendations on what things should be getting fixed in linux. The site name is Ubuntu Brainstorm. What you waiting for ? Go and vote there !

Nov 6, 2007

WoW on Linux

Woot ! I got World of Warcraft running on Linux ! Let me enjoy a nerdy moment of glee :-D

Links :

Dec 2, 2006

3D desktop anyone ?

Vista is going to be released. Some people are gung-ho about the Apple OS. But they still are the 2D desktops. What if your dekstop went 3D?

Check out the video below :

Jun 26, 2006

Finally gone to 64 bits !

What you see here is nothing great - just a linux distribution running. So, what the heck am I doing with putting another screenshot up here ?

Well, this is a brand new system. Almost everything has changed. From a 32bit architecture I have moved to the 64bit architecture. From an Intel processor, I have moved to an AMD one. From Fedora , I have moved to Ubuntu.

And the move was rocking - in another way - it rocked my boat. I have never had such a difficult time installing Linux ever before. It seemed that I had one of the chips that is not really being used much, and some alien motherboard. All in all , it was not a straight forward installation - but now I feel great having gotten it done !

For those not interested in technical mumbo-jumbo, I will just describe the above screenshot :-D. This pic was taken at Janjira Fort in Maharashtra. On the desktop you see on the left all my windows partitions mounted so I can access the various stuff I keep there. Also you can see the icon for Google Earth - which runs just fabulous under linux. Right side the tranparent thingys are something you will have to wait till vista becomes available if you are not on linux. Here I have running various small 'desklets' with cpu speed, temp etc. Also am playing some songs ( err. TV is not yet working... ).

For the technically inclined and also for my ref in case I have to reinstall, here's what to do to get AMD64 Athlon with Nvidia graphics card working.
  • Download the Ubuntu alternative CD.
  • Install in text mode from it.
  • Reboot into safe recovery mode
  • run 'dpkg-reconfigure xserver-xorg . Select vesa (nv will be selected). Press 'enter' for most screens except where it says something about 'glx' . Disable glx on this screen.
  • reboot - viola ! you are in linux
  • Download additional software as your need is.
Next on the agenda to get Neverwinter Nights , my all time favourite game , to run on linux.

Here endeth the lesson for today.

May 7, 2006

Rocking on Linux !

Well, I had this post a few days back about using a dual monitor setup with my system. Some comments were positive, but some were ... ahem... pointing out how dirty my room is !! Well, I normally don't care, especially as when you are trying out something new, you do tend to get messy ... but then a comment was made - which made me realize ... that I better do something about it ! Also, got a cable connection which necessiated a change in room configurations. Here's how my room looks now ;-) ...

BTW, I am watching HBO on cable TV in this screen shot... and the computer is running Linux. :-D


Check out the wiked bedsheets ;-) . After much hunting for black bedsheets, I was only able to get something which is a mix of black and white. No idea why people don't stock black sheets !

Bet, that got you interested, so I thought I might as well take a few screenshots of my system running Linux. Here's how it looks - plain vanilla. Nice wall paper eh ? ;-)


If you are wondering what is what - check out this annotated pic on Flickr.

And, here's how it looks running a few things. As you can see I am editing this blog, and listening to Rang De Basanti, running an openGL spectrum analyzer.


Of course setting it all up on linux is not as easy as on Windows, but, as you can see, Linux is pretty close to windows in terms of usability.

If you need to intall linux on your system, I provide consultancy ;-)

Feb 12, 2006

3D desktop interface for Linux

Windows Vista is supposed to come out with a 3D interface named 'aero'. However, it is supposed to be released with the release of Vista - scheduled for this year end.

However, a linux initiative has already come up with a 3D interface called Compiz. I haven't been able to try it out yet as I don't have a PC at home :( . However the screenshots are pretty amazing. The one below is a OpenGL whale swimming across your desktop.


How cool is that !! :-)

May 18, 2004

Just installed blogger on linux . Checking out how good it works...

System config :
Redhat Fedora Core 1
Mozilla 1.4.1